

When embarking on a bikepacking adventure, it's crucial to have the right tools at your disposal, and to pack them the right way. Bikepacking—a mix of all-terrain cycling and backpacking—is a sport where the vital aspect of gear management is both an art and a science. You have more space on a bicycle than you'd have backpacking on foot, but it's still at a premium. So picking multifunctional gear and attaching it to your bikepacking bike in a streamlined way is a fundamental skill of the sport.
One such piece of multifunctional gear is the COMBAR, a heavy-duty multitool designed for outdoor enthusiasts. With its hammer, hatchet, spade, knife, and saw, the COMBAR is a versatile companion for bikepackers. However, securely attaching and storing the COMBAR on your bike requires a little know-how to ensure accessibility and safety. In this article, we will delve both into methods for attaching a multitool to your bike and locations on your bike where you can securely attach it.
Mounting Methods:
Below is a range of mounting methods that will let you securely fasten your COMBAR to your bike frame. Consider these the first half of your mental mounting toolkit—the How. We'll look at ski straps, zip ties, Molle straps, and a dedicated case, and discuss the pros and cons of each, helping you choose the best method for your bikepacking mission.
1. Ski Straps
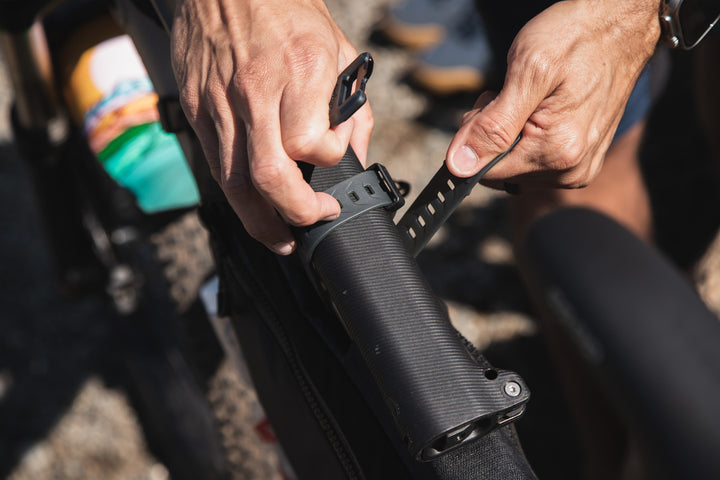
Ski straps offer a convenient and adjustable method for attaching the COMBAR to your bike. The flexibility of ski straps allows you to mount the tool on various parts of your bike frame. Pros of using ski straps include their durability, ease of use, and compatibility with different frame shapes. They're also soft and stretchy, which helps protect your bike frame and gear with points of supple cushion. However, it's important to note that ski straps can loosen a little bit over the course of a day. They may require periodic readjustment and can be slightly less secure than other attachment methods.

2. Zip Ties
Zip ties are a cost-effective and straightforward option for securing your COMBAR to your bike. They provide a tight and secure attachment, ensuring that your multitool stays in place during your bikepacking journey. The advantages of zip ties include their affordability, lightweight nature, and simplicity. However, keep in mind that zip ties are typically single-use and may require cutting and replacing when accessing the COMBAR.
3. Molle Straps
If your bikepacking setup includes Molle webbing or attachment points, Molle straps can be an excellent choice for securing the COMBAR. Molle straps are highly versatile and offer a secure attachment method, ensuring that your multitool stays firmly in place. Many bikepackers want a case with Molle attachment points, like the COMBAR™ CASE. The COMBAR Case is designed with versatility in mind, so it's compatible with Molle straps. The benefits of Molle straps include their adjustability, compatibility with various Molle systems, and reliable stability. However, you will need a bikepacking setup that includes Molle attachment points to utilize this method effectively.

4. Case
Using a dedicated case for your COMBAR provides the utmost protection and organization. The COMBAR case is a well-designed case that can securely hold your multitool and prevent it from getting damaged or lost during your bikepacking trips. Cases often feature additional compartments to store other small essentials, keeping everything organized in one place. However, it's important to consider the added weight and bulkiness of a case, which may impact your overall bikepacking experience.
Mounting Locations:
Finding the perfect location to securely attach and store your COMBAR on your bike is crucial for a successful bikepacking adventure. The right mounting location ensures easy access to your multitool while minimizing interference with other gear and maintaining overall bike balance. In this section, we will explore a variety of mounting locations that offer different advantages. Whether you prefer the top tube, bottom tube, handlebars, saddlebags, or even a backpack attachment, we will discuss the pros and cons of each option.
1. Top Tube
Mounting the COMBAR on the top tube of your bike frame offers easy accessibility and keeps the tool within arm's reach. This location allows for quick access during emergencies or whenever you need to use the multitool on the go. However, the top tube position may interfere with the space needed for other bikepacking gear, such as frame bags or water bottle cages.

2. Bottom Tube
Attaching the COMBAR to the bottom tube provides a secure and out-of-the-way location. This placement ensures that the multitool is less exposed to external elements and potential theft. The bottom tube position also helps distribute weight evenly across the bike, maintaining stability during your bikepacking adventure. However, keep in mind that the lower position may limit accessibility, especially if you have a full suspension or a bike with limited clearance.
3. Handlebars
Mounting the COMBAR on your handlebars offers a prominent and easily accessible location. This placement is ideal if you prefer having your multitool within immediate reach while riding. However, attaching the COMBAR to the handlebars might interfere with your hand positions and limit the space available for other essential bikepacking accessories, such as lights or a GPS.

4. Saddlebags
If you utilize saddlebags for your bikepacking setup, attaching the COMBAR to the outside of the bags can be a viable option. This position ensures that the multitool is readily accessible and does not take up valuable space on your bike frame. Additionally, the COMBAR remains well-protected within the saddlebags during your bikepacking journey. However, the external placement might increase the overall width of your bike, potentially causing clearance issues in narrow spaces.
5. Backpack
For bikepackers who prefer carrying their tools on their person, attaching the COMBAR to a backpack is a practical solution. This method ensures that the multitool is always within reach, even when you are off the bike. Additionally, a backpack provides flexibility in terms of tool placement and can accommodate other personal belongings. Consider using the COMBAR case to help prevent any accidental punctures or cuts within your backpack. However, keep in mind that the added weight on your back might affect your balance and comfort, especially during longer rides.

Conclusion: Keep it Handy
When it comes to securely attaching and storing your COMBAR on a bikepacking bike, there are various methods and locations to consider. Ski straps, zip ties, Molle straps, and dedicated cases offer different advantages and drawbacks. Similarly, choosing between mounting locations such as the top tube, bottom tube, handlebars, saddlebags, or backpack depends on your preference likely uses. Remember to prioritize accessibility, protection, and compatibility with other gear when making your selection. By carefully considering the options outlined in this guide, you can find the perfect combination of method and location to ensure your COMBAR is securely attached and readily available for all your bikepacking adventures.
————————————
What is the optimal method for carrying your COMBAR while bikepacking? Let us hear it on social media: @aclim8gear. And make sure to sign up for our email newsletter (sign up below) so you never miss a pro tip or trip report.
Want more biking content? Check out Why You Should Never Go Dirt Biking Without a COMBAR.
Ready to uplevel your at-camp skills? Check out How to Make Perfect Campfire Kindling Using your Basic Survival Tools.
Want to get inspired to take a multi-night motorbike mission? Check out Overlanding Down Under: An Adventure Motorbike Trip Across Australia.
————————————
Shop the gear from this article:
