

If you’ve gone camping, you’ve inevitably had conversations about campfires—how to build one, how to light one, hacks for starting a campfire more quickly or in wet conditions, Lincoln logs vs. tee-pee. And on, and on.
In amongst those conversations, at some point, ideas about kindling have surely come up. How should you prepare kindling before starting your fire? How big should your kindling be? Etc. On its face the idea of campfire kindling seems simple: find some twigs and small sticks, stack ‘em up with airflow allowed, put a piece of toilet paper underneath, and light. Right?
Well, sort of.
If you instead apply a repeatable framework, and a few tried-and-true rules of thumb, you can make perfect campfire kindling, every time. Commit this framework to memory and what to your friends might look like you gathering a few twigs and sticks, will in fact be a rock-solid system for prepping your campfire. A system you can rely on, even amidst the stress of a survival situation. In this article we’ll outline a simple and repeatable framework for making perfect campfire kindling. Here we go.

Fire Starting Basics
First, a few fire starting basics.
The most important part of starting a fire is understanding the basics. You need fuel, air, and spark.
The fuel, that’s your kindling. Your fuel will also include tinder (the smallest most flammable bit that’s used to hold the initial flame) which could be paper, fire starter, or even cotton balls smothered in petroleum jelly.
Airflow and a spark are also essential ingredients to starting a campfire. You can read more about how much airflow is too much (or too little), and various ways to generate a spark (besides just matches or a lighter) in our blog 4 Alternative Fire Starting Techniques with Survivalist and Overlander, Trevin Baker.
Here we’ll focus on kindling, the fuel.
To quote Trevin Baker, the survivalist who’s contributed to ACLIM8’s blog before:
The fuel is the most important to understand, as it has the largest impact on the success of your fire. It must be dry if the fuel is wood or other organic combustible. Typically, you need to gather four different sizes (diameters) of fuel: Pencil lead, pencil, thumb, and double thumb. You’ll also need the initial tinder that will start the fire. This can be dry birch bark, a cotton ball smeared in petroleum jelly, or a big handful of moss and leaves.
The Four Fundamental Sizes of Kindling
The key point from Trevin’s quote is the various sizes of kindling you’ll need:
• Pencil lead• Pencil
• Thumb
• Double-thumb
Getting these specific sizes of kindling is what you want. But how do you do it without simply scanning the forest floor for various twigs and sticks?

What Makes for Perfect Kindling?
Perfect kindling is highly combustible (i.e. flammable and dry) and it’s split into sizes as close as possible to the four listed above.
Both the dryness and the size of your kindling can vary widely if you are searching the wild land around you for you kindling. If, instead, you can find one source of dry wood that can be processed down into your various sizes of kindling, you’ll be quicker and more precise with your kindling creation.
Pro tip: Find a single fallen tree branch with smaller branches coming off of it. Assuming it’s dry a tree branch like this can have all the widths of kindling you need in one place.
If you brought firewood or there happens to be some wood at your campsite left by those who stayed before you, those log-sized pieces are also a good “source wood" to make kindling from.
If you can’t find a single branch or log to make your kindling out of, no worries. Just grab an armful of broken branches that you can chop down into smaller pieces. From here it’s a matter of breaking your source wood into kindling. For this, you’ll need the right tools.

The Tools You Need
The basic outdoor tools you’ll need to break your wood down into kindling are:
- Saw
- Hatchet
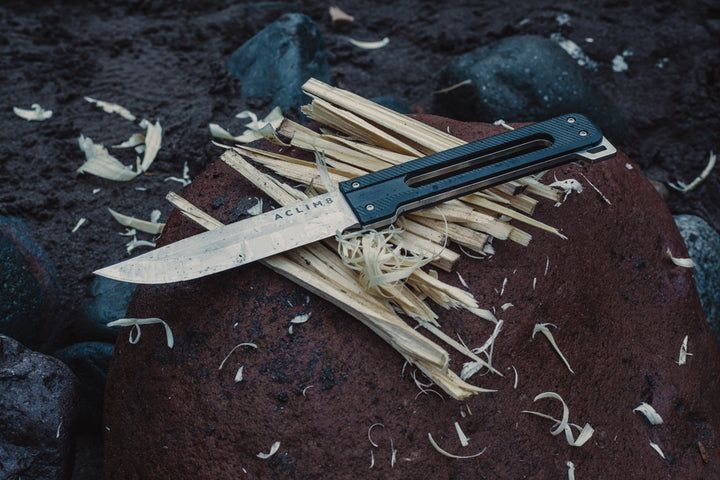
- Knife
- Hammer
You’ll use the saw and/or hatchet to make small logs out of the source wood you find.
You’ll use the hatchet to split these larger pieces into medium sized pieces (your double-thumb kindling).
You’ll use the hammer and knife to precisely split medium sized pieces into smaller pieces (your thumb-sized and pencil-sized kindling).
Here are some of the tools and fire starting gear Trevin takes on his overlanding and backpacking adventures:
A solid fixed-blade survival knife is always the first thing I grab, and I always keep flint and steel with me. On hikes and overnight trips, I like to keep waterproof matches and a small ziplock bag of cotton balls smeared with petroleum jelly with me. These are lightweight and don’t take up much room but will save me if we have a very bad experience out on the trail. A lightweight saw and hatchet are also very helpful, especially when overlanding.
The Steps to Making Perfect Campfire Kindling
1. Find your “source wood”
Either a single branch, pre-cut log, or armful of medium sized logs that can be processed down into kindling (use your saw and/or hatchet for this if necessary)


Trevin checks the moisture level of the wood using his face. This technique can be used if your hands are covered or cold.
2. Make your double-thumb kindling (use the hatchet for this):
Carefully notch your hatchet into the top of your small log and split the log by swinging it down onto a hard stump with the hatchet still notched into the top OR carefully stand up your small log on a hard stump or hard ground and split it by swinging down onto it with your hatchet.
Pro tip: You can be more precise with you splitting if you notch your hatchet first and then swing down on a hard surface with the log fixed to the hatchet blade.
3. Make your Pencil (knife-hammer combo for this):
To make your pencil-sized kindling repeat step three on your thumb-sized kindling using only the precise, knife-hammer technique. The hatchet will be too imprecise for this.

5. Pencil lead (whittling technique for this, just knife):
To get the thinnest bits of kindling, the pencil-lead sized pieces, use only your knife to whittle wood shavings into a pile. These will eventually be placed right on top of your tinder and will the first pieces of wood in your fire to light up.

After this, all you need in terms of fuel is your tinder.
3 Kinds of Tinder That Will Light Right Up
Tinder is the small, highly flammable fuel you’ll use to hold your initial flame and light the rest of your kindling. When your kindling structure is built (we won’t uncork the age-old debate over Lincoln logs and other fire structures here), you’ll tuck your tinder under the heart of it, so the flames will ignite the pencil lead and pencil sized pieces of kindling.
But what materials make for the best tinder? Classic ones include toilet paper, paper towels, newspaper, dry moss, bark, or cotton ball. Oily or waxy sawdust balls can also be purchased at outdoor stores that are specifically made for starting fires. And there are tons of functional fire starters for survival and campfires for purchase online. We’re always inclined to go the DIY, self-reliant route, though, so…
Besides the obvious tinder types mentioned above, these three materials make for awesome tinder, and will ignite and stay lit even in poor conditions:
1. Cotton balls smothered in petroleum jelly
One of the main ingredients in petroleum jelly is, you guessed it, petroleum! Which is oil-based, highly flammable, and will burn for a long time. Simply rub a handful of cotton balls in petroleum jelly and store them in a sealed tin or case to make your own, super-reliable tinder kit.
2. Dryer lint stuffed in a toilet paper tube
There’s a reason you hear about “dryer fires” burning down homes and apartments, the lint that builds up in the vent is basically super-fine bits of dry cotton, denim, and other flammable fabrics. Scrape together a ball of this lint from your dryer and stuff it into some kind of paper container (toilet paper roll, egg carton, etc.) and you have a great tinder for starting a fire. You can also just put the lint itself in a plastic bag or tin and use it on its own without a paper holder.
3. Corks soaked in rubbing alcohol
This one’s creative and requires a water-tight container, but it’s quite easy. Take a handful of corks (as many as will fit in your water-tight container) and put them in said container. Fill the remaining space in the container with rubbing alcohol and shake. Anytime you’re starting a fire, simply pull a cork out and use it as tinder.
There are also tons of functional fire starters you can buy online, if you want to save a little time.
Now you have your perfect campfire kindling, your ingredients, your mise en place as the chefs would say. It’s time to assemble your fire. For more on that, check out our article How to Start a Fire for Survival in the Wild.

Pro Tips from a Survivalist
Trevin Baker has a few tips for those who are venturing outdoors, especially if you’ll be on your own or far from other campers:
If you’re headed into the wilderness during the colder months or in areas of less than 50 degrees [Fahrenheit] at night, remember these principles and carry the bare essentials: flint and steel, matches, or a lighter for your ignition device and an easy tinder such as cotton balls smeared with petroleum jelly.
He has many more tips including how often to brush up on your fire starting skills, and other potentially life-saving items you should bring with you in 4 Alternative Fire Starting Techniques from Survivalist and Overlander, Trevin Baker.
Why You Should Have a Repeatable Process
When it comes to making campfire kindling, this simple and effective approach will serve you well. Commit this approach to memory by practicing it for at least a full year of outdoor trips. And we recommend trying it in the backyard a couple times before you go into the backcountry.
By having a repeatable, effective process memorized, you’ll not only look like a pro in front of your friends, but you’ll be able to rely on habit or “muscle memory” in poor conditions, or in survival situations where stress can cloud your thinking.
There are, of course, many ways to get a fire going as well as alternate kindling sources. If you have other kindling-making techniques, we’d love to hear from you on social media. Send us a message at @aclim8gear on Instagram.
———————————
Follow Trevin on Instagram @dukeengineeringsolutions or @trevinthetraveler on Facebook.
Want more survival content? Check out 5 Winter Survival Tasks Using the COMBAR Pro Titanium.
Looking for overlanding pro tips? Check out Overlanding? Keep These 5 Essential Items In Your Emergency Kit.
————————————
Shop the gear from this article:
